With this onboarding method, we will create an Active Directory App Registration in your Microsoft 365 tenant and limit the scope of API mail access to only the shared mailboxes you are onboarding.
NOTE: This document uses our demo 365 tenant, Pin Nilly (pinnilly.com) for the examples. You will see your own tenant's name during your onboard.
If this is your first time onboarding or you are a new customer not currently working with a member of our team, Emailgistics offers complimentary onboarding assistance. Our team will connect with you and walk you through the process step by step. To schedule an onboarding session, please contact [email protected].
Create the Application
- Log in to the Microsoft Azure portal and go to Microsoft Entra ID.
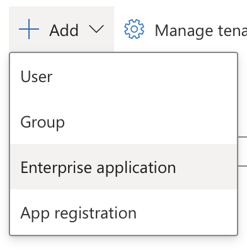
- Choose Add → Enterprise application.
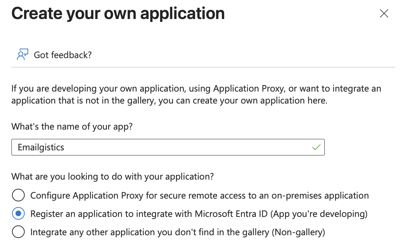
- Choose Create your own application.

- Enter a name (any name is OK; we'll use "Emailgistics"), select Register an application to integrate with Microsoft Entra ID (App you're developing).
- Click Create.
- Choose Accounts in this organizational directory only (your tenant name only – Single tenant).

- Click Register to create the app.
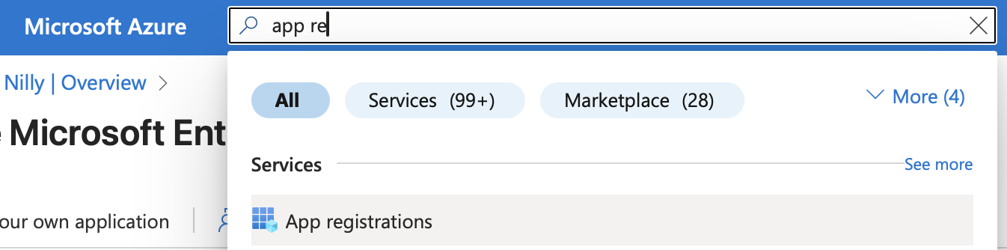
- Using the Microsoft Azure search bar, find the App registrations item and select it.
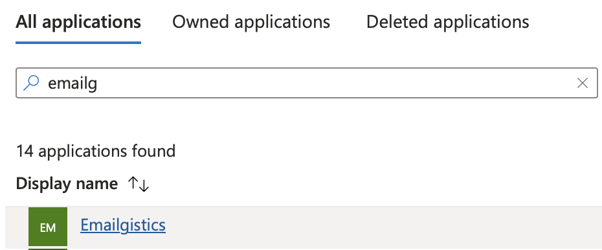
- In App registrations, click All applications, find your newly-created application, and click on it.
- Select Manage → API permissions.

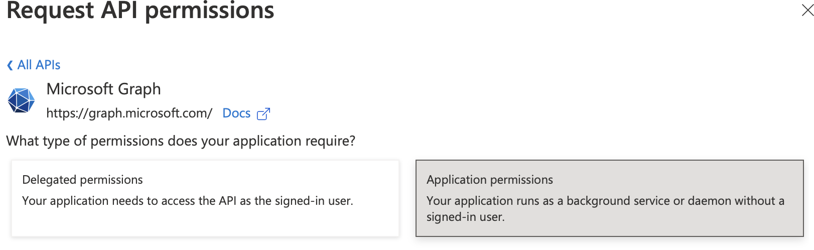
- Click Add a permission, choose Microsoft Graph, then choose Application permissions.
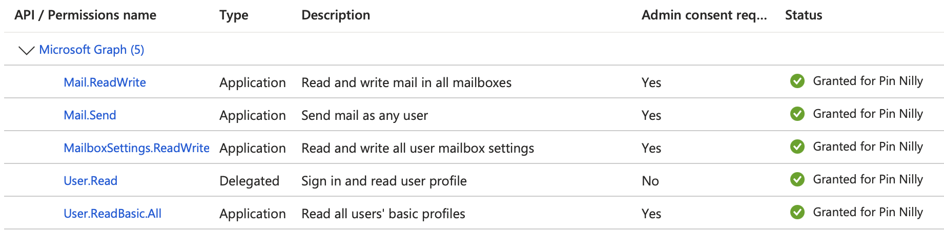
- Find and check the following permissions:
Mail.ReadWriteMail.SendMailboxSettings.ReadWriteUser.ReadBasic.All
- Click Add permissions.
- If the Status for any of the permissions shows as "Not granted…," click Grant admin consent for your tenant and click Yes to confirm.
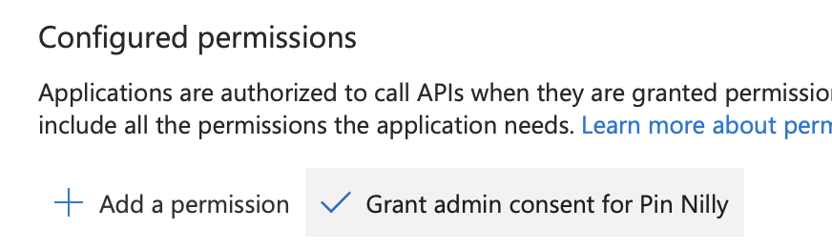
- The status for each permission should then show "Granted for…" your tenant.
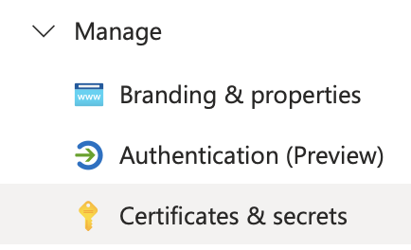
- In the left-hand menu, choose Certificates & secrets.
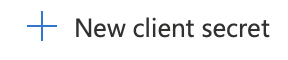
- Click New client secret.
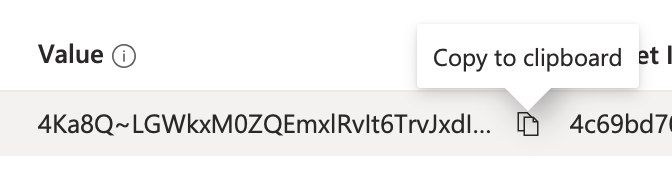
- Enter a description and expiration and click Add.
- Note the expiry date. You'll need it in a later step.
- Copy the Value for later use.
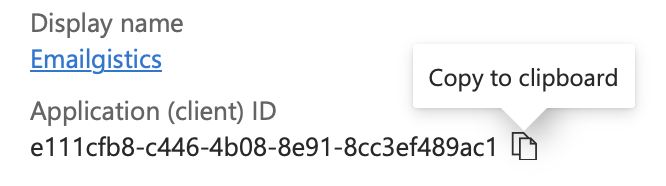
- Click Overview in the left-hand menu.
- Copy the Application (client) ID value.
Restrict Access to Shared Mailboxes
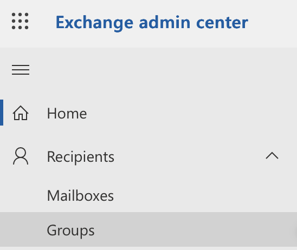
- In Exchange admin center, choose Groups from the Recipients menu.
- Click Add a group, choose Mail-enabled security for the type, and click Next.

- Give the group a name and click Next.
- Assign one or more owners and click Next.
- Click Add members and add the shared mailboxes you want to onboard, then click Next.
- Give the group an email address and click Next. Note the address.
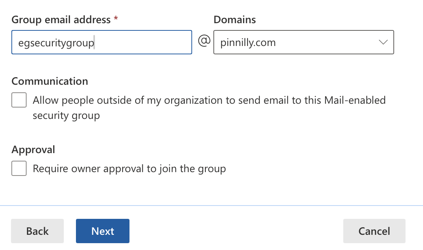
- Click Create group.
- Open Windows PowerShell and connect to your tenant with:
Connect-ExchangeOnline
- Copy the following command, replace the two
replaceMeWith...values, and execute it in PowerShell:
New-ApplicationAccessPolicy -AppId replaceMeWithApplicationIdValue -PolicyScopeGroupId replaceMeWithEmailValue -AccessRight RestrictAccess -Description "Restrict this app to shared mailboxes."
These permission restrictions may take up to 30 minutes to take effect.
You Are Now Ready to Onboard!
The process of onboarding a mailbox to Emailgistics is primarily completed via a PowerShell script. Microsoft Windows generally comes with PowerShell pre-installed; if it is not available, it can be downloaded from Microsoft's app store.
PowerShell version 5.1 or later is required to execute the script. To verify the installed version, open PowerShell and enter $PSVersionTable in the command line.
When using PowerShell scripts that access Exchange Online and Microsoft Graph, administrators should verify appropriate permissions are in place. Ensure the following modules are present in your PowerShell environment:
Microsoft Graph Module
Check if installed:
Get-InstalledModule -Name Microsoft.Graph*
Install if not present:
Install-Module -Name Microsoft.Graph -Scope CurrentUser
Exchange Online Management Module
Check if installed:
Get-InstalledModule -Name ExchangeOnlineManagement
Install if not present:
Install-Module ExchangeOnlineManagement -RequiredVersion 3.7.1 -Force
You may be prompted to trust the repository; respond with "Yes" or "Yes to All."
If you use any network-related antivirus software such as Sentinel One, we recommend allowing the execution of PowerShell scripts that access Exchange Online.
Initiating the Onboard
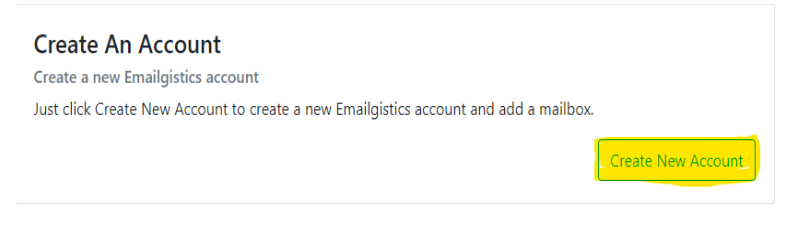
Go to www.emailgistics.com and click Sign In. You will authenticate with Microsoft single sign-on (SSO).
If you are a new customer, click Create New Account.
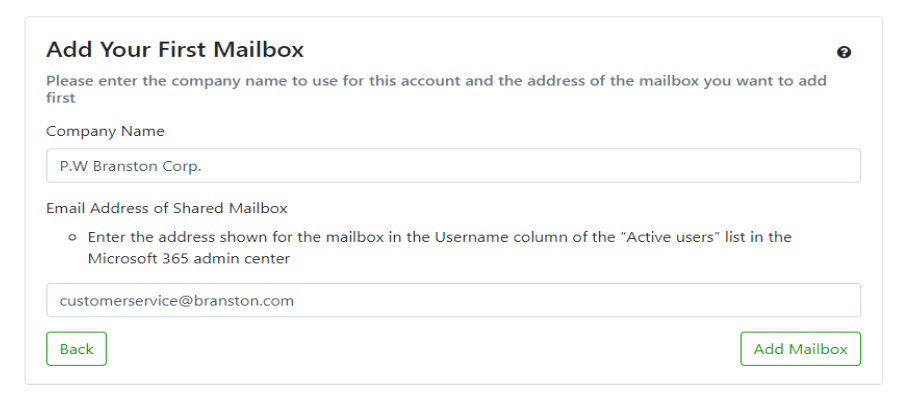
- Provide the name of the organization and the shared mailbox and click Add Mailbox.
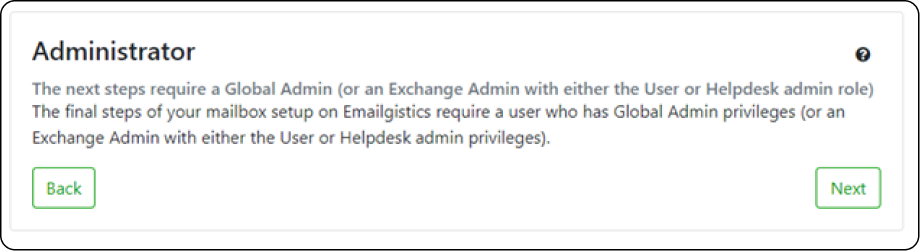
- You will be redirected to a page that requires you to confirm if you are a Global Admin in O365. If not, a Global Admin from your organization will need to complete the rest of the onboard process.
- Once confirmed, download our PowerShell script and extract it from the ZIP file. Ensure both the Onboard.ps1 file and the Customer.JSON file are extracted to the same location.
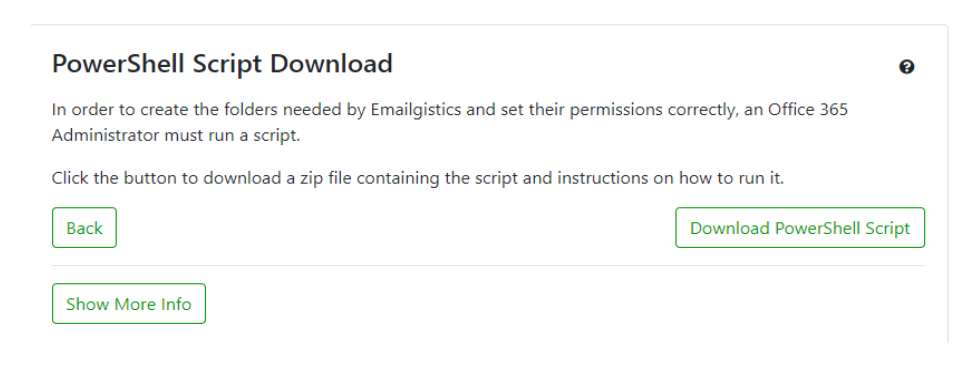
Right-click Onboard.ps1 and select "Run with PowerShell". Note that some networks or VPNs may require you to run the script as an administrator or while on the organization's network. Follow the prompts to complete the onboarding process.
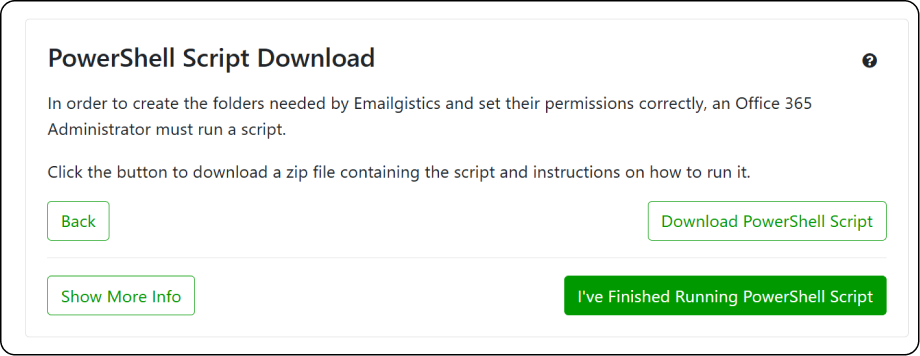
Once the script has finished running, return to the browser and click "I've finished running PowerShell script."
- After returning to the browser, the first page is Grant permissions to Emailgistics. On this page DO NOT CLICK continue yet!
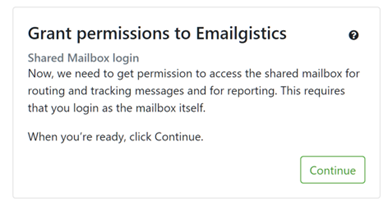
Because Emailgistics can be onboarded in two different ways, you will need to bypass the option to log in as the mailbox to authenticate. Instead, you will use the information you created earlier in Active Directory.
- Press the A key. A Use Azure AD App Instead button appears. Click it, then click Continue. The Azure AD app page appears.
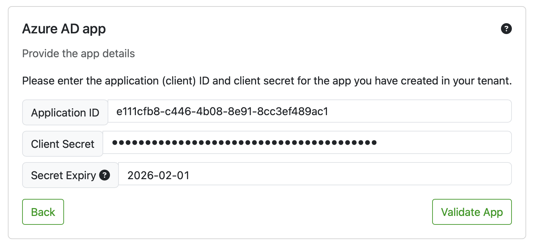
- Paste the Application ID from the first section.
- Paste the Client Secret value from the first section.
- Set the Secret Expiry to the date you saved earlier. (Emailgistics will alert you in advance of this expiry date so you can generate a new secret and update it in Emailgistics Admin.)
Once validated, click "Set up mailbox."
Note: If the inbox folder contains over 1,000 emails, this step will fail. See the Preflight Checklist for more information.
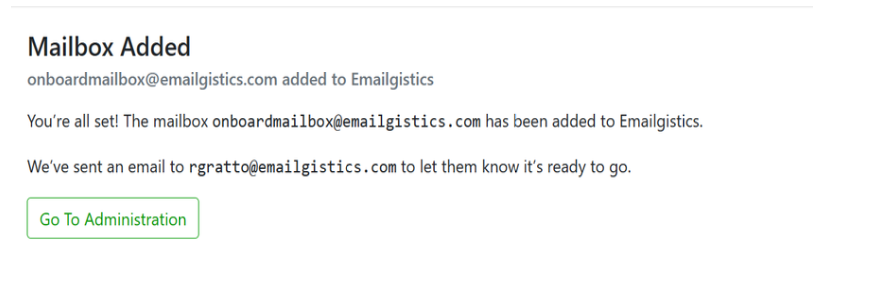
Your mailbox has been successfully added. Click Go To Administration to access the administration center.
Need help getting started? Our team is happy to walk you through onboarding at no cost. For assistance or issues, contact [email protected].